English French German Spain Italian Dutch Russian Portuguese Japanese Korean Arabic Chinese Simplified

this widget by www.AllBlogTools.com
Showing posts with label Tips. Show all posts

The Essential Drum Skills and Techniques

Learning the drums for the first time can be a very difficult thing to do. There's more to this musical instrument that someone can lose ground very easily. Many people maybe has already know how to play drums, but it is difficult to advance their skills.

Whatever the situation is, learning the essentials of this massive instrument is a must. There are some lessons to learn to play and practice on the drums effectively. Before starting any other lessons on the drums, every beginner drummer should go through these essentials and master them. Even an advanced drummer still has to go through them again to ensure even do not miss anything.

The first essential skill is a drummer must know before anything else is how to hold a drumstick. This is something most drummers do not take the time to really learn, they will just hold the stick in any way they feel comfortable. In fact there are specific ways to hold the drum sticks to make sure a drummer go over all the different variations. Whether played in traditional grip, matched grip, or French grip, there is a special way to hold drumsticks to get the most bounce and response of the stick. If this technique is taught at first, yet the practice sessions become more efficient.
The next thing every drummer should know is how to calculate the time. This is not as easy as counting 1 to 4, there is a little bit more. The ability to calculate the time refers to the ability to calculate different time signatures, notes, and beats. The beat or groove counting ability determine properly drum playing.

One essential skill most drummers do not know is how to tune a drum set. But actually the case is if a drummer can tune his drum set correctly, the whole drumming experience will sound much better. Knowing the instrument is the first step in learning it.

Another essential skill is, drummers must learn is how to read sheet music. So many drummers do not have time to even consider learning this. Understanding a little bit of drumming theory is the best thing any drummer can do for themselves, after all, drums are still music. Knowing how to read drum notation will get a ton more gigs and jobs as a drummer. Other musicians will appreciate more as well. But besides all this, there will be a beginner drummer to be able to learn faster.  Reading sheet music capability can take advantage of all the free drum lessons and beats online. [source: Essential Drum Skills]

Improve drum skills and techniques Click Here!

How To Choose The Right Drum Sticks


There is absolutely no doubting the importance and value of the drum sticks for every drummer. These people also recognize the value of choosing the right one coupled with even the perfect cymbals. It is important to note that all these are chosen with the correct measures in place in order to render the best of music beats as and when needed. For all kinds of drummers ranging from novices to professionals there is a set criterion for the choice of drum sticks that are to be used for any occasion. Let us take a look at some of the steps that would help in the choice of the right one.

One of the most crucial things to take into consideration is the tip. Here we would have two different decisions to make. We have to choose between the nylon tip and the wood tip. It is important to note that the wood tips are softer than the nylon tips but the latter is very great to use with the electronic drum sets since they would not scratch or splinter them. The wood tips on the other hand are able to produce a warmer sound even though it may not be that durable. The shapes of the tips would vary like the oval, triangle, barrel and the round. Indeed each of would produce a very unique sound which means that one has to be very careful as the choice is being made.

One other thing to be on the lookout for is the size of the drum sticks. These are normally identified with about two different criteria and would include the number and the letter. The letter would normally refer to the recommended application for the usage of the stick. For instance there is the 'A' label which would be for softer music while the 'B' has a medium diameter and therefore would be very much versatile for a wide variety of music. The 'S' designation can be used for the playing of drum corps and bands because they have the largest diameter. Another criterion is the number with a 5 indicating a thinner label as compared to the number 2.

Your choice of drum sticks should also be dependent on the kind of wood you want. This is because there are the oak, maple and hickory woods used in the production of the drum sticks with each having their own features. 

Read more about hand percussion and music stand light.
Article Directory : http://ArticleDirectory.com

Learn How To Sing Harmony

 By Pamela C Smith


So you always wanted to learn how to sing harmony? Here area few tips which will get you started on how to sing harmony. If you thought that singing was difficult wait till you start harmonizing. Since it involves synchronizing your voice with another singer you will have to work really hard to sound right. Also you cannot push mistakes made while harmonizing under the carpet because they are glaringly obvious. So try these exercises to learn to harmonize correctly.

Harmonizing is by far one of the most rewarding styles of singing. When you harmonize your voice with that of another singer the cumulative effect is a very rich tone. But it is certainly not easy as mentioned earlier because your singing will have to blend with that of another person. Begin by learning to recognize harmony. A good way to do this is by listening to a favorite song. You have to pay attention to the melody and the instruments.

Try to listen for instruments that are being played in harmony with the melody. This will take some practice since instruments which are playing in harmony will blend effortlessly with the melody while the other instruments will sound more conspicuous.

The next step after you recognize the harmony is to try it yourself by matching your voice with the instruments. This will not be an easy task in the beginning. To make things easy try harmonizing with the help of a piano.

Play a note on the piano and try to blend your voice with it. You may not get it right the first time around. This is a god exercise to learn about the different notes that work in harmony.

You don't have to practice with just one note. It is important to record yourself while practicing. It is also important to listen to your performance. This is a good exercise to learn about how to sing harmony, singing at the proper pitch level and to pick a good note to harmonize.

This exercise will also help you to understand the moods created by the different harmonies.

Now go back to your favorite song and pick out a few notes of melody that you want to harmonize with and try singing notes that are three notes higher or lower than the melody simply try sliding up and down three notes to find the harmony and the different moods that the different combination bring out.

As a last step, put everything you have learn to practice and harmonize with another singer as you record yourselves.

Even though singing harmony required a lot of patience and effort it is well worth it when you hear yourself harmonizing with another gifted singer. 

For the best advice on harmony singing, go to How To Sing Harmony for all you need to know.

Article Directory : http://ArticleDirectory.com

Piano Lesson: It Is Easy To Compose Piano Sheet Music


Why is it easy to compose piano music?

Because you have to start from where you are. This should be fairly easy; Otherwise you have not started from where you are.

A suggestion is to start writing piano pieces for beginners in a progressive order. The idea is that as the pieces get more complicated for the player they will also become more complicated for you to notate and compose and you will subsequently learn as you write.

How is composing beneficial for your piano playing?

1. Your compositional endeavours will make you more and more aware of intrinsic musical subtleties in the music of other composers. When you start to think and feel like a composer you will also become a better performer as well. Performing is also a creative process similar to composing.

2. When you compose you will become a better sight reader.

I remember an assignment I had many years ago when I wrote the music to a musical. It made me aware of many notational problems I had not taken the time to solve for myself before.

When I started to play my piano music again I was astonished when realizing it was much easier for me to sight read complicated piano sheet music. The reason for this I concluded was my concentrated effort to notate my own piano music.

The process to play something with my fingers and and then try to notate the music on manuscript paper was so to speak a reversed sight reading exercise.

What about manuscript paper?

You can use a notation program or you can write on paper or use both approaches. I suggest that you start writing on paper the way that composers have done for centuries.

Composing piano sheet music by hand on manuscript paper is a cheap and effective exercise to learn the various sheet music symbols.

Very often I jot down musical ideas on ordinary white paper after drawing five lines by hand. It works fine if you can't find your manuscript paper. You can buy manuscript paper for sheet music or print out your favorite format for free on the site http://www.blanksheetmusic.net

In conclusion, composing piano sheet music can become a natural part of your daily practice routine.

Spend half an hour a day composing your own piano sheet music and you will increase your musical knowledge and become an even better musician!

And remember; Composing piano sheet music is fun! 

Peter Edvinsson is a musician, composer and music teacher. Visit his site Capotasto Music and download your free sheet music and learn to play resources at http://www.capotastomusic.com
Article Directory : http://ArticleDirectory.com

Improve Your Voice With These Tips On How To Sing Better


Although most men and women may never try out for American Idol, a good number of people would like to discover how to sing better. Here are some helpful tips:

A vocalist should always help their body to continue to be relaxed. Any time a vocalist is standing up while singing, they must lift up their arms about 6 inches out from their sides as that should enable a full expansion of the lungs. While the singer breathes in, they must fill up their stomach totally with air. When the individual breathes out, they force the air out of their lungs employing the diaphragm.

The diaphragm can be described as a curved muscle that divides the lungs from the abdomen. It's positioned just beneath the rib cage. Keeping relaxed is essential, simply because anxiousness is going to cause tension in the diaphragm, and destroy a performer's potential to hold and sing clear notes. The singer will need to position their feet into a well balanced posture and also in alignment with their shoulders.

Putting one particular foot just a bit in front of the other might also give good results. The knees must never be locked; rather, they should be held slightly bent. When the performer will be in a sitting position, keeping the back in a straight line but never stiff is crucial. In this specific posture, the feet will need to be approximately 12 inches away from each other, and both will need to always be flat on the ground.

A higher note is much more effortlessly reached when the arms are lifted somewhat over the six inch level. A gentle smile may in addition end up being useful. A delicate crying sound, underneath the words the singer is singing, can even greatly enhance his or her ability to attain these particular notes. Rehearsing singing "boo hoo" to attain this will provide fantastic success. With regard to lower notes, dropping the arms a bit, creating a larger opening with the mouth as well as encouraging the jaw to relax will generate the deep resonating tone desired.

Muscle memory is crucial in mastering how to sing better. Putting too much forceful pressure on the muscle groups encircling the larynx or voice box will hurt the performer's capacity to carry a tune. Attaching a certain amount of a dopey sound to the voice is going to encourage the muscles surrounding the larynx to relax. Once these particular muscles are trained correctly, the dopey tone can be eliminated and a clear singing voice that reverberates just above someone's standard speaking voice will catch everybody's notice. Keep in mind, high and low notes can't be hit when a lot of tension is present.

Believe it or not, what a person eats or drinks before singing can easily have an impact on the quality of their voice. Taking in bottled water or fruit juice could be beneficial, but one must do so an hour or two in advance of performing. Cigarettes, dairy goods, and alcohol can produce detrimental results and can hinder the crystal clear notes that the singer is trying to attain.

Additionally, getting in shape might be valuable for the singer, and it will produce helpful consequences for a more powerful voice. The more deeply the vocalist can breathe the much better their voice can resonate with more clear tones. The person's confidence will also be enhanced, which is generally valuable, especially since being relaxed is an important component of being a successful singer.

In the event that a singer is genuinely serious about learning how to sing better, they need to take into consideration hiring a vocal instructor. He or she will teach correct methods for conditioning the voice and keep the singer from harming their vocal instrument. 

Would you like to learn to sing online? If so, you will want to visit my site for vocal training exercises which can help you learn to sing better.
Article Directory : http://ArticleDirectory.com

Easy Steps To Soundproofing Walls In Your Recording Studio

 By Justin Hayes

The benefits of soundproofing walls in your home are many. No matter what your reason, you will certainly appreciate the short time and effort required to accomplish this task. On the other hand, if you are trying to set up a home recording studio, it is an absolute necessity.

The truth is, newer homes are far from soundproofed. So, anyone can overhear others talking, even when they are trying to be discreet. So, it can lead to a slew of other problems. In homes where a growing family lives in, privacy can really be an issue. Parents need some time away where they can talk and spend time together. It's nice for them to know that they don't have to whisper and tiptoe around continuously when their children are asleep, for fear of making them.

Or, the sounds of those walking on upper levels can drive others on the lower levels absolutely mad. Couple that with the fact that many people have taken on home offices and working directly from the house. While it is good on one hand, it can be quite frustrating to concentrate with all the noise that goes on around you. But, you can resolve these issues in a quick and easy manner.

For those who are serious about their home recording studio, optimum sound can only be had in an environment that is soundproofed. There are no ifs ands or buts about it. The fact is, without the room being soundproofed, the playback of music will be poor and lacking in many ways. Additionally, there could be different types of interferences and feedback that will affect your music.


Of course, there are different ways to go about this, but it doesn't have to be extremely expensive. In fact, you can do it economically. In fact, it doesn't even require any serious work or demolition nor many supplies. The answer to this is applying Green Glue on your drywall and then adding another layer of drywall to each side of the wall.

Soundproofing Wall Instalation
Of course, it has to be done on both sides of the wall you were soundproofing. The layer of glue will be easily applied on the wall, the drywall will be adhered to it, and screwed in with proper screws. Then, plaster, drywall tape and such will have to be applied to finish the job and make it look right. It is an effective method because of the glue which is a viscoelastic dampening compound that prohibits sound or noise from penetrating the surface.

As you probably already know, voices and sounds travel. But, This Green Glue avoids this from occurring. Furthermore, it doesn't allow the sound to flank and penetrate the ceiling either. In other words, you won't have to work on floors and ceilings to get the best sound proofing results. The only thing you have to focus on are the actual walls.

The job in question will only require about a day, depending on the size of the room. And, if you have help, you can cut that time even further. Once the soundproofing is completed and the walls are nicely finished, they can be painted, wallpapered or finished in any decor method of your choice. 

To get more information about Soundproofing Walls make sure you look at more of these free tips at Recording Studio Design
Article Directory : http://ArticleDirectory.com

Getting Ready for Recording Studio Sessions

By Drake Crossland

Stepping into a state-of-the-art recording studio to record with a band is a dream come true for many musicians. But time spent in a recording studio is very expensive and if you show up unprepared you can end up having a costly and difficult experience. Here are a few things to keep in mind to prepare your band for their first trip to the studio.

Prepare Well

To make the most of your money, you don’t want to waste any time in the recording studio. Make sure you know the songs you plan to record inside out. Working out vaguely defined sections of a song or practicing a difficult riff while on the clock will break the bank for most beginner musicians. Have structured practice sessions before the day you plan to record.

Most recording studios start charging at a set time regardless of if you are there or not. Make sure you have everything packed up and ready to go before you are scheduled to arrive. Make sure your instruments are properly tuned and that you have replacement strings, drum sticks, and picks.

What to Expect 
 
The initial setup for recording comes as a surprise to many musicians. You may spend up to four hours of time simply setting up the instruments and playing while the engineer gets the levels right. This can be especially tiresome for getting the right drum sound. Come prepared with samples of guitar and drum sounds that you like so that the engineer can attempt to dial in a similar sound for your recording session.


First, your band will lay down the basic tracks of the song. This usually includes drums, bass and rhythm guitars. Most studios have the ability to record multiple instruments at once. Alternatively, they will let you play along while one instrument is recorded to help keep the place in the song. The entire process goes much smoother if the drummer – who keeps the beat and structure of the song intact – knows every detail of every song.

After the basic rhythm tracks have been recorded, you get to the more exciting part of adding vocals, solos, percussion, samples or other flourishes that fill out the sound of the band. Don’t be surprised if everything takes a lot longer than you expected. Keep things moving by having band members who are not recording practice in another room for the part they will soon perform. This way, everyone is contributing to getting through the process as efficiently and cheaply as possible.

Mistakes to Avoid

The recording studio is not a place to party. Drinking, smoking, and other drugs will only make it harder to perform at your best. Having guests come to the recording studio may serve as a distraction that wastes time and money.

It is also important to know when to call it a day. If you are recording vocals and your voice is shot, it will show. Recording can be an mentally and physically exhausting. If you are too tired to perform your parts well, switch to having another part recorded for the rest of that session.

Success in the recording studio can make or break a band’s career. Make sure to prepare well for your recording session and get your music out there for the world to hear. 

For more information and for professional advice regarding your music career, please visit recording studios in Toronto.

Article Directory : http://ArticleDirectory.com

Tips For Rap Beat Instrumentals


HOW TO CREATE A GOOD SOUNDING BEAT USING A BEAT MAKER - THIS IS EASIER THAN YOU THINK

If you do learn that your song or beat is not sounding the way you wanted it to, do not be afraid to just trash the project and start from scratch. Before buying a beat maker, you need to make certain that it comes with plenty fo sound files that you may play around with, as well as easy export options. To produce a good sounding beat utilizing your beat creator is now simpler than it ever used to be, since almost all of the tools for making beats now come with a cheaper interface multi-track sequencer with a mp3 transfer option. When you create a beat, it's always a good idea that you start with your percussion or drum sounds first.

HOW TO MAKE YOUR OWN RAP BEATS?

There are a variety of things that you can certainly do to help you with taking your music to the next level and here are a number of tips to assist you in doing so. It is not that hard to create an OKAY sounding music track, but it is very hard to create tracks that ends up sounding like a professional beat.

MAKE BEATS JUST LIKE A PRO

Producing can be identified as when you generate music or beats for your Hip Hop song. It is always best to know more about beat making software before you get started with creating your master piece, as opposed to being clueless about it. The MPC sampler and the MV8800 are similar in design and function.

WHAT SOFTWARE TO USE IF YOU WANT TO LEARN HOW TO MAKE YOUR OWN RAP BEATS

Korg Triton Extreme
A number of the better beat creators involves the Motif ES8 Workstation, the Korg Triton Extreme, the Roland Fantom X6, the MPC Sampler and the Roland's MV8800. The Korg Triton Extreme is one and the best originators in the Hip Hop world of today.


THE BEST AND MOST POPULAR SOFTWARE ONLINE

The Fruity Loops software is good for beginners because of its affordable rates and it is simple to utilize functions. WHY is Sonic Producer better than Fruity Loops, well it is cheaper than the Fruity Loops starters.


Click Here to check out the best programs to make beats that will let you to Create Beats online easily. With the right beat making program you can begin making nice music pretty easily.


Article Directory : http://ArticleDirectory.com
 

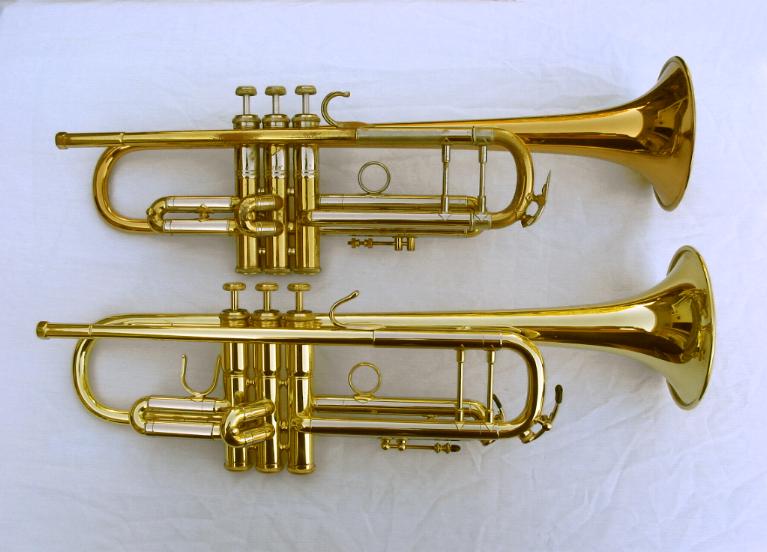
How To Clean Your Bach Stradivarius Trumpet


If you want your Bach Stradivarius Trumpet to last for a life time, then be responsible enough to clean it as often as you can, at least three times a week. There is an available maintenance kit for Bach Stradivarius Trumpet. You could get them online or you could go to any instrument stores and ask if they have maintenance kit for trumpets.

Cleaning means preventing any unwanted damage to your Bach Stradivarius Trumpet. It is to technically avoid a premature wear and tear to happen. One reason that could preserve your trumpet to stay longer is by regular cleaning. Cleaning is very simple, it'll only require your time and effort but then it will be all worth it as you see the result after that.

There are certain areas that you must give more attention to when cleaning your Bach Stradivarius Trumpet. These include the mouthpiece, valves, and keeping the slides moving freely and smoothly. When cleaning the valves, you may need to apply small amount of oil to the piston everyday. If your valves are dry it could cause abrasion to the metal and reduction to compression which could damage the trumpet in due time. Another benefit is if the valves are regularly oiled, it will prevent air leakage along the cylinder walls which improves the efficiency of the tone. It could also save you money if you keep the valves well lubricated because it's expensive to do valve replating, it will cost not less than $350.


The mouthpiece is the second area that you need to concentrate when you're cleaning your Bach Stradivarius Trumpet. When cleaning the mouthpiece it's necessary to use a mouthpiece brush. The intonation and the blowing freedom of the trumpet will be affected if there is an accumulation of dirt in the mouthpiece area. Rust will also start to build-up if you don't get rid of the dirt which in time will cause damage to your trumpet. You need to thoroughly clean the mouthpiece with the use of nylon brush plus warm water and soap to get rid of the dirt that builds up to retain the durability of the mouthpiece, do this two to three times a week.


Also, we need to maintain the slides to move freely and smoothly by greasing and waxing it regularly which will keep them performing well. Premature damage or leak can be a cause of lack of lubrication to the slides. Try to mix valve oil with grease if you think that grease is too thick for the slides to attain the desired consistency after which apply it to the slides. This is how you effectively clean your Bach Stradivarius Trumpet. 

Looking to find the best deal on Bach Stradivarius Trumpet, then visit www.trumpetcentral.com to find the best advice on Bach Stradivarius Trumpet for you.

Article Directory : http://ArticleDirectory.com

How To Enhance Your Music


Many times you require a change in the way you look at music. Sometimes you need to start a routine. If you are feeling that what your are doing musically needs a lift, why not step back for a while and do something a little different. It is definitely a great idea to take a quick breather and explore brand new things in order to sharpen yourself.

Here are a few ideas...

1. Change Your Focus. If you or your kid are already in lessons you may think about making a change in the music you're currently studying. Go with something more light-hearted or select a theme. The theme could be based on something that is going on in your life such as understanding new songs to play at camp or a current interest like music from movies of your favorite actor. Just step back, make use of your imagination and allow yourself to experience new and different stuff.

2. Change Your Mindset. Take some time to clear out some of your inhibitions about music. It's not an overnight process, but you can easily discover a lot more freedom by taking a look at things that could be holding you back like memories of being criticized. Try to approach your music from a mindset of letting go and having fun. That in itself will take some practice, but it can be done.

3. Learn a New Instrument. Whether or not it is your very first time or you play everything out there, learning a new instrument can be great fun. Yes, you will have to practice, but learning is fun. Just spend some time with the instrument. After you've lived with the instrument a while you can decide if you want to go further or leave it as a whimsical diversion.

4. Liberate That Old Instrument. Have you ever played a musical instrument inside the high school band? Pull it out and have some fun with it. Don't critique yourself to death. Remember you are doing this for your own enjoyment. Find a place to play. There are groups that let in people of all levels. You should know that playing with a group of individuals can definitely help you get back in shape a lot quicker.

5. Create Your Own Opportunities. You will probably have to produce your very own opportunities, especially if you live within a rural place. You don't have to start your own music group, but you could have reading party or a jam session. This was very popular in the days before recorded music. You could do it one time or create a club. Just make sure it is a no pressure event.

Your musical diversion does not need to be hard. Take a slightly different path and see where you end up. It's all about having more music in your life. 

Click Here to check out the good Music Creator Software and find out how you can make plenty of good quality beats using a method to get you in the zone. Once you get in the zone you will be on good of your game.
Article Directory : http://ArticleDirectory.com

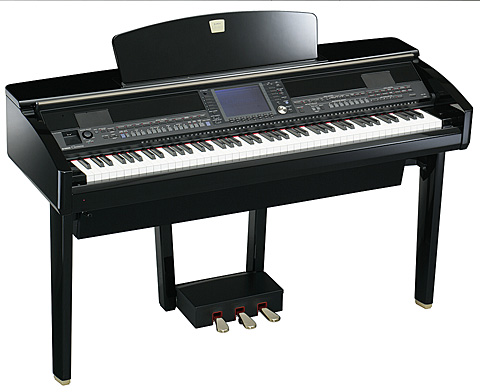
Shopping for a Piano: Acoustic vs. Digital

 by E. Chung

The most serious piano teachers will adamantly point their students in the direction of an acoustic piano. For serious piano studying, I agree with this completely for reasons I will discuss shortly. But for many reasons, a genuine handcrafted instrument may not be the best choice for you. With the affordability, portability, and the many features that come with digital pianos, you may wish to head the other way. Summarily, the question of acoustic versus digital boils down to a matter of authenticity versus everything else.

Mostly, the drawbacks of an acoustic piano are matters of practicality, such as price. For what you could get a new, decent quality digital piano with, you’ll be dealing with a rather meager acoustic. This can encompass a number of problems. For instance, aside from any tuning it might need, the overall sound quality of a cheap acoustic piano can be quite poor. This may not just be an issue of bad strings, but can result from an infinite number of possible factors arising from any of the complex mechanics of the piano being in disrepair. Other common problems of old pianos are broken keys and sticky keys, which is when the keys fail to spring up the way they should. There may also be faults with the framework that can range from nuisances to impending hazards. The list of the possible troubles of a bad acoustic continues indefinitely, and it is likely that the piano will need a decent amount of initial maintenance, in addition to periodic maintenance, which is likely to pull a few additional large bills out of your wallet right way.

Also, because of its bulk and weight, an acoustic may be a very difficult accommodation for people living in tight or elevated spaces, such as dorm rooms and certain city apartments. Some buildings may even prohibit pianos, particularly on floors above the ground level, because the weight and bulk of pianos make them quite cumbersome and possibly hazardous to either the tenants or the buildings themselves. This raises the issue of portability as well. Do you gig? Do you relocate frequently? Toting a 500 pound upright piano isn’t possible for most people; moving one across the room is a challenge for most people. If your music should ideally be ready to go, your hulking wooden companion is not going to be sympathetic.

Acoustic pianos also lack the many features present in digital pianos nowadays that may be valuable tools to you. For example, volume control may be necessary in dormitory, or close living, situations. Newer digitals also come with a suite of onboard functions, including on-the-fly recording, voice customization, electronic metronome, and even music mixing features, which you won’t have. You will also lack the benefit of porting your music to your PC; a simple MIDI connector would feed your performance directly into your computer’s audio card without any ambient noise or loss of sound quality, which will probably beat any recording made with an acoustic piano and consumer grade recording hardware available at a neighborhood electronics store.

In light what you’re giving up in bells and whistles, surely you will be at a degree of inconvenience being committed to an acoustic piano. Still, despite the great deal of effort digital piano makers have put into their product, none have been able to truly reproduce the sound and feel of a good acoustic piano. First, lets talk about the piano sound. To most people, casual or occasional listeners of piano music, the sounds made with an acoustic piano and a digital piano are quite identical and equally satisfactory musically. But listen closely, because there is an important difference.

A digital piano outputs high quality recordings of the sounds that were made by a real piano at one time. During the process of making a digital piano, each key of a real concert grand piano is struck a number of times at varying velocities and recorded with sophisticated equipment. This array of high quality recordings will serve as the digital voice, and will give the digital piano a rather broad range of tonality and an overall likeness of an acoustic piano in varying music dynamics. But once the notes have been recorded and finally integrated with the digital piano’s voicing mechanism, they are never going to be changed. Even though the aesthetic quality of the sound may be state of the art, it is the way the sounds should behave but cannot because they are fixed recordings that is the fundamental problem of digital pianos.

An acoustic piano uses a complex array of hammers, strings, a soundboard, and other moving parts that function in collaboration. This means that when any note is played, it is not played with entire independence, but is highly affected by the current state of the surrounding components of the piano. For example, playing a chord on a digital piano will simply result in three notes being played, as they were recorded individually, at the same time, whereas with an acoustic piano, the three notes will interact with each other through the soundboard and become a stew of vibrations, producing a different, more complex, and ultimately richer sound. Lacking this quality of pliability, what comes out of digital speakers will typically be quite simplistic and boring, and will be most unsatisfactory to aficionados of the true piano tone.

An acoustic piano is also an analog instrument, which means is has virtually infinite range. For example, there is no limit to the loudness or softness a note may be played on an acoustic piano. With digital pianos, there is a point at which a minimum or maximum will be achieved. This means there will be occasions when you will not be able to play a note as softly or as loudly as you wish. In order words, true pppp or ffff are probably beyond the scope of digital pianos without you resorting to adjusting the volume dial while you’re performing. Even if you were to do that, the tonal quality of the notes would remain static from that point on, when it would further continue to dull or brighten on an acoustic piano.

Another problem of digital devices is the matter of intervals. In photography, for example, pixels are the intervals. With a traditional film camera, the amount of detail you are able to capture is theoretically unlimited because film is a single and continuous malleable body. The “film” of a digital camera is not single or continuous but is a multitude of pixels, each of which is only able to record a solid block of color. The amount of detail a digital camera is able to capture will depend on how small the pixels are and how tightly they’re packed together. If the pixels, or intervals, are small enough and packed closely enough, the amalgam of the blocks of color they record will appear to be smooth curves and gradients to the human eye.

There is a similar issue of intervals with digital pianos, which is mainly the issue of touch sensitivity. Digital pianos have a finite number of intervals when it comes to key pressure. The more intervals there are and the closer they are to each other, the more realistically the piano will respond to your dynamics. High end digital pianos will have quite a lot of them. But digital pianos within the means of average shoppers may not have sufficient sensitivity. This means that while the vast difference between piano and forte may be noticeable, the most intricate variances of touch pressure may be disregarded. This will be quite a nuisance to pianists seeking a highly responsive instrument, particularly when it comes to meticulous classical music.

It also manifests in pedaling. Piano pedals are ranged. Between simple on and off, or up and down, there are degrees. “Half-pedaling” and “quarter-pedaling” are crude terms describing the manner of pedaling in which the pedal is only pressed partially down in order to create an intermediate effect. For instance, rather than completely depressing the pedal so that the full brilliance of a note is sustained, you may wish to depress it only half way to dampen about half of the note and let only the remainder of it sustain for a subtler, suppressed quality. Certainly a scrupulous pianist will wish to employ the complete range of pedaling available to him, which may not be represented entirely accurately in a digital piano.

Aside from sound, as mentioned previously, key touch is also an important issue. Digital piano makers these days have gone to great lengths to reproduce the feel of acoustic pianos. For the most part, they’ve done a good job. They’ve even gone as far as implementing graded hammer action, which is in line with the hammers of acoustic pianos gradually becoming lighter from left to right. As a matter of fact, if you could take a look at the inner workings of a digital piano, you would be quite surprised and impressed with the complexity of the hammer mechanics. However, as long as digital pianos look the way they do, being the shape and size they are, there is going to be a limit as to how authentically the key feel can be made.

The hammers in a digital piano are simply extensions of the pianist’s fingers. When the pianist presses a key down, it will raise the opposing side of the lever, which touches an electronic pad inside the piano that serves as the string. The hammers in an acoustic piano do not behave this way. Instead of being extensions of the pianist’s fingers, they are rather like projectiles that are sprung at the strings high above them. Imagine the carnival game where you hit the pad on the ground with a mallet, which flings a projectile up the meter towards the bell at the very top. The finger is the mallet, the visible piano key is the pad, the hammer inside the piano is the projectile, and the string is the bell. First of all, this means if you press a key all the way down but not with the minimum amount of force needed, the projectile hammer will never leave its seating and the string will actually never be struck. On the part of the pianist, this launch-pad-like action will need a slightly different technique than the seesaw-like action of digital piano hammers, predominantly in difficult works. Secondly, it will feel noticeably different under the fingers.

The only way this can truly be reproduced in a digital piano is by the use of bona-fide acoustic hammers. And there’s nothing wrong with doing that. But the problem is there isn’t enough room for them inside the compact size of most of the digital pianos today. That’s why as long as they look the way they do, the action of digital pianos will not feel completely akin to that of acoustic pianos. Certain higher end models do integrate the acoustic hammer action simply to recreate the key feel. Even higher end models, which are called “silent pianos,” integrate strings as well and are bona-fide acoustic pianos with the added ability to remove the strings from the action and toggle on digital mode in order to provide volume control! But these tend to be even more expensive than acoustic pianos.

In terms of what the average piano shopper will be able to afford, the difference in the overall performance between a digital and acoustic piano will be stark. To restate what I said at the beginning of the article, it really boils down to the authenticity versus everything else. And the authenticity is usually going to cost you more to get. What you should think about is how important it is to you that the piano truly resembles an acoustic. Are you a classical piano student looking at a long road of perfection and possibly a career as a concert performer? Then a digital piano is probably not what you want to be practicing on, even as a temporary substitution, because there is a good chance it will hurt your technique. It is possible to get financing on an acoustic piano, so I would recommend going that route, using your budget of cash as a down payment. If this is not necessarily what you have in mind for your musical venture, then perhaps a digital piano is all you require. Depending on your needs, it may not be a mere reduction of an acoustic, but a substantial upgrade with all the features you’re going to get. Typically, a digital piano will be more than enough to satisfy one’s musical appetite.


Source: http://www.articlecircle.com/ - Free Articles Directory

About the Author

E. Chung is a student of classical piano and webmaster at Piano Lessons with Master Teachers, a freely available collection of interviews held with over 30 legendary concert pianists and teachers concerning the art of piano mastery. To learn more, visit his website at http://www.piano-lessons-master-teachers.com.

Tips on Buying Music Gear for Home Studios

by Victor Epand

Owning your recording studio at your home is an added advantage when you are a composer. But it is a challenge for getting the right kind of unit to sustain for a longer period of time and save money in the long run. Getting yourself an outdated system can not be worthwhile and reasonable. You cannot work for long with such system. This can cause you to spend more again and again. You should know what you want and get the compatible devices. Here you can find some of the basic tips on buying music gear that can guide you to assure the best results and save you from unnecessary expenditure. 

First of all you need to decide what kind of studio you want. There is a pro studio ideal for recording full bands. This kind of studio can deliver CD master recordings. The other is a project studio, which generally supports recording electronic synths, samplers and maybe a few live players when needed. The quality level meets TV and film standards. 

Another form of studio is the home MIDI electronica mainly software studio with at least one or two mics. It could also be a demo or a song writing studio with mics or even just a little hobby studio, or just want to make music studio. All the above mentioned options can be accomplished but there are certain things you also need to look into really carefully before buying music gear. 

Avoid buying the same feature over and over again on different pieces of music gear. You may only end up otherwise having a number of preamps, samplers and recorders that you cannot use and they are just an additional expenditure. 

Do not buy Cubase and Sonar and try to get them to work together. Or get Sound Forge and Sonar, as these applications will not work at all on a Mac. Therefore, it is advisable to be well versed with the music gear before purchasing them. 

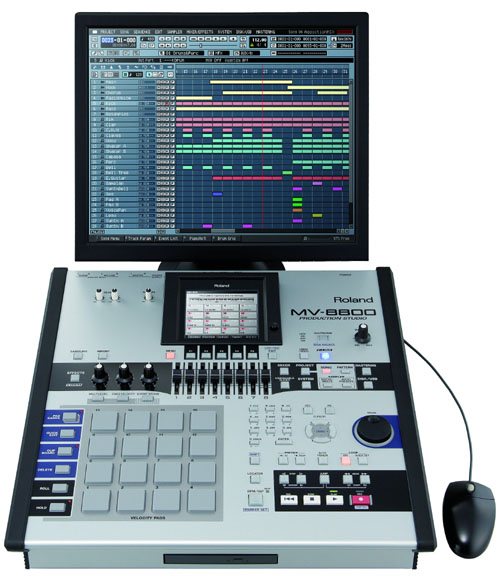
Roland MV8800
The recorder you choose be it a multi track, computer sequencer, or MPC 4000 and MV8800 are the most far reaching decision you can make. But, you have to consider that choice carefully. It is advisable to learn one form and master it, and then you can resort considering buying them.

There are stores that offer 30 days return policy on music gear. This can also be a great idea that makes it real easy for you. Get it for trial and when you find it is perfect for you then only you can opt to buy. 

Many people face a lot of difficulties with the software they buy because they do not understand or misread the recommended requirements to run the software. Never buy software if you cannot meet the stated requirements.

When buying a music gear try to stick to the companies that are supremely focused on your computer platform, your operating system and in some cases your motherboard and your CPU. Some soundcard drivers may refuse to work well with some chipsets on some motherboards.

Do a thorough research before buying music gear. Ask questions from your dealer or you will end up spending extra for your digital mixer. Therefore, the price of a piece of gear, which is at a lower price, may mean spending another extra dollars to make it work. 

Always buy the latest music gear to avoid future expenditure. Buy the cheaper or a secondary music gear now, and then it will be outdated in some years and you will have to buy the new one and this will cause unnecessary expenditure. It is best to wait a year or two after the release and then buy the finished, mature, stable products. Features may look good on paper but may not sound good in music. If you buy cheap music gear you may just end up buying again. 

Besides the above mentioned tips of buying music gear, there are other variables you need to look into, like the cost of service, the upgrades, software and many more. Above all, the bottom line is the sound that should be your prime concern. Focus on the sound coming out of the speakers. Great sound never goes out of style.

About the Author:
Victor Epand is an expert consultant for music gear, speakers, and microphones. You can find the best marketplace for music gear, speakers, and microphones at these 3 sites: music gear, music equipment, studio music gear, Sonar, speakers, and laser microphones, parabolic microphone.
Article Source:
Include this link when reprinting this article: http://www.freearticles.co.za/music/tips-buying-music-gear-home-studios.html

How To Make Hip Hop Beats - Use These 5 Top Tips To Get Started

By: Ty Peters


If you've always wanted to learn how to make hip hop beats, don't be put off just because it can sometimes be frustrating. It's the same whenever you learn something new. The good news is that it can also be extremely fun and rewarding if you go about it the right way. To help make things go that little bit more smoothly, we've put together five top tips on how to get going with making your own beats.


  1. Pick A Style: Firstly, you'll need to think about the kind of style of music you'd like to make. This can be just about anything, as long as you feel strongly about it. When you've chosen a style, start to listen to it as much as possible and you'll start to unconsciously learn more about what this style requires, and what you'd like to create when you start making your own music.
  2. Getting Your Song Ready: You'll then need to choose a song and an artist that you want to create beats for. Knowing how to make hip hop beats properly means learning how to order the song the way you want it, placing the verses and choruses the way that you think works best. You'll probably have a better feel for this after listening to other songs in step 1.
  3. Start Creating the Beat: Now you'll want to start adding the beat to your song. The drums are a very important foundation, and the best place to start. You'll want to make sure they are strong and steady. Now just keep adding what you need so that you build it up to exactly the way you want it to sound.
  4. Getting It Right: This is probably the hardest stage. You'll need to layer your beat, and pan the instruments to make sure that the sound is just right. Take your time, listen carefully and you'll get the result that you're after. When you mix your beat, make sure you get the volume right but never distort the sound.
  5. Getting Your Beat Heard: Now you've done all the hard work it's time to get your beat out there! Put it on CD or on the web and get other people to hear it!

These are the five basic steps you'll need to master on your quest of how to make hip hop beats. Of course it takes a lot of practice, but if you make sure you listen carefully you'll do well to create the beats you really want.


Author Resource:-> Have you always wanted to know how to make your own music but are feeling overwhelmed about how expensive the gadgets are? The good news is that it's now easier than ever to make beats online, which is a really inexpensive way to still make the great sounding beats you want to!

Article From Article Directory

Easy Guitar Lessons: Chord Structure

Author: Oguz


A technical familiarity of harmony is not a certain prerequisite to the enjoyment of music, but the amateur musician, and listener alike, should be conscious of harmony as a basic of guitar chord structure.  He should be aware of some basic principles, properties and uses of this element, while learning how to play guitar.

Harmony as an element is more seasoned than rhythm and melody.  It is virtually non-existent in old cultures.  Moreover, it is an element which came into view comparatively late in the music history, and which was developed primarily in western civilization.

Harmony is a musical element  established upon the concurred union of musical tones (as differentiated from the sequential tones of a melody), or the accompaniment of a melody by chords.

A combination of three or more tones played concurrently and perceived as sounding as a whole is called a chord.

C-major scale
A few fundamental principles can help you understand the basics of routine building of chords. The simple one is the major triad, which includes three tones.  You can build a triad by choosing the tonic of a certain major scale and by adding two or more tones above it on alternate degrees of the said scale. For example, if we start with the tone C/do the tonic of the C-major scale, you get the triad do-mi­-sol, 1-3-5, or C-E-G.

The tones of any chord maybe picked out in different order, and they maybe duplicated an octave above or below without changing the essential nature of the chord. This is the reason why so often we see chords such as C/E, (the first inversion of the C major triad using the chord tone E as the bass) or C/G (the second inversion of the C major triad where the tone G is used as the bass).

Constructing chords in thirds (on alternate scale levels as delineated) was the foundation of all conventional harmony from 1700-1900.

In the twentieth century impotant music composers have grown larger the chord vocabulary by extra means of building in order to create more enjoyable and compound  effects.  Although additional means of construction have been introduced, modern pop, rock and jazz music still follow the conventional way of chord construction – by thirds.

Going back to the major chord, you may be  wondering why there are lots of fingering for a given major chord. This is possible since in the 12 frets of the guitar, the notes are repeated in increasing octaves, at their corresponding string.  C, for example, it  is on the first fret at the B string, third fret at the A string, fifth fret at the G string, and on the eighth fret at the E strings.

So conditional upon how the melody of the song is organized, the chord formation can assume any fingering position if the triad is formed and however it is played easily.

Minor Triad
Now that you have a knowledge on the major chord, let us look at its parallel counterpart, the minor chord.  If the third of the major triad is altered by lowering it to one semitone (one fret on the guitar and two frets for each whole tone), the resulting triad will be C-Eflat-G, which is the minor triad.

Take your time with the fret board of your guitar and investigate all the possible fingerings, for the minor chord. You may see that if comparing it with the major chord fingerings, only one string is lowered when forming the minor chord, not until there is a doubling of the minor third (Eflat).

If ever you are wondering why all the examples given here are on the C chord, well, it is now your turn to apply the lesson here.  Chart down the major and minor chord triads for the rest of the notes and … start playing guitar!

P.S.: I suggest you to use a learn guitar software to learn guitar fast and easily. Learning chords is very easy if you use a guitar learning software.

Get A Clue: Becoming The Next Biggest Singer

by Corey Wilson


First off if you want to become a better singer you've got to, "get a clue." What I mean by that is you have to learn some basic information, then gradually increase your studies. My philosophy is if you want to be the next best anything you have to be equal to or greater than what is already out there.

Now, how do you expect me to do that? I'm glad you asked. You have to know what kind of singer you want to be for example; a mainstream performing artist, or an underground independent artist. With both mainstream, and underground you need some basic essentials.

Here are some examples of some of the things you may need. You may find that some of them are common sense, but some people need to understand that you can't get to far in the industry without them. For example; vocal training (regardless of your skill level), you need to study the business, take songwriting classes, get a manager, get a lawyer, start recording, and shop your music.

With mainstream artist after you've taken those basic steps everything depends on if the major labels want you or not. Now for an underground artist its a little different. After your lawyer copyrights your finished music for you, all you need to is duplicate it then distribute it. You can distribute it to mom and pop stores, or directly to your customers. You can also sell them at the shows your manager has set up for you.

Throughout everything you go through on your journey remember one thing, "don't let anyone tell you that you can't make it". Use people's negative comments as motivation to drive you to the next level. Also always critique yourself, you can even have listening parties to get feedback on how you are progressing. Remember this is a journey and if you are at ground level there will always be people that will try to put you down, but if you stay focused how can you lose. "I may not climb the whole mountain but I'll die with dirt under my fingernails."-- T.D. Jakes

About the Author:

If you want to get started today here's some information about vocal training. If your looking for related information about the music industry then visit my site for all your needs.


Write Songs Like The Pros With This Powerful And Proven Technique


For many years, professional/top writers (writers in general...and not just songwriters) have been using a powerful and proven technique that separates them from beginners.

And now, I’d like to share this secret technique with you.

If you consistently apply the following 3 steps, you’ll notice a big improvement in your songwriting:

1.  Gather as much information about your song idea as possible.

Once you’ve come up with an idea for your song, write down (or type) all related information.
For example:

            · Song Type (ex. love song, inspirational song, up-tempo, etc.)
            · Song’s Title
            · Your objective (what you wish to accomplish with the song)
            · The message you are trying to bring across to your listeners
            · Emotion you are trying to evoke in your listeners
            · ...and so on

2.  Command your “subconscious mind” to help you with your objective.

With the information you have in front of you, give your subconscious mind a direct command.

For example:

If you’re a lyricist, just before you start reading what’s in front of you, say something like:

     “Subconscious mind, create powerful lyrics
      with the information I’m about to read.
      Work on it 24 hours a day...even as I sleep.”

(If you’re given a melody to write lyrics to, say the following just before listening to the melody:  “Subconscious mind, create powerful lyrics for the melody I’m about to listen to.  Work on it 24 hours a day...even as I sleep.”)

If you’re a lyricist/composer, just before you start reading what’s before you, say something like:

     “Subconscious mind, create a powerful song
      with the information I’m about to read.
      Work on it 24 hours a day...even as I sleep.”

(With that last command, you’re basically instructing your subconscious mind to come up with both the lyrics and melody...the “perfect marriage” of both.)

Now, if you happen to be a composer, you could also benefit from this technique.
Just place the finished lyrics in front of you and say something like:

     “Subconscious mind, create a powerful melody
      for the lyrics I’m about to read.  Work
      on it 24 hours a day...even as I sleep.”

(If you simply want to create a beautiful melody from scratch, just apply Steps 1 to 3.  Of course, in Step 1, some of the information mentioned...ex. song’s title or message you are trying to bring across...are not completely necessary.  However, as a rule, the more information you have, the better.  What’s important is that your subconscious mind has enough information to work with...and it knows exactly what you are trying to accomplish.)

(Note:  You’re free to create your own version of the above commands.  Also, you can give the commands either aloud or silently in your head.)

It’s even a good idea to apply this step before going to sleep, whenever possible.

3.  Let it go.  

Think or do something else...anything else.  In other words, “trust” your subconscious mind to deliver...by getting out of its way.

This is a crucial step.  In fact, this is the key to this technique’s effectiveness.  Without honestly applying this step, you will not get the positive results you’re after.

What you do is you simply “allow” your subconscious mind to carry out your instructions...without questioning it...without interfering in any way.

In other words, you take your mind off the song by taking a short break...or even a nap.  Or you sleep on it...and work on it the next day (the truth is, some writers take days or weeks off before actually writing).

Basically, you want to give your subconscious mind enough time to work on what you’ve instructed it to do.

(Many creative people call this the “incubation” phase of the creative process.)

When you do this, you’ll notice that when you sit down to actually start writing, thoughts or ideas come to you more naturally...and in a more organized way.  You’ll notice a better flow to your writing overall.  (This is because your subconscious mind has done a lot of the work for you...in the background...while you were busy doing other things...or while you were sleeping.)

(If you’re a composer, melodic or musical ideas will naturally come to you...and sometimes it will happen when you least expect it.  That’s why it’s a good idea to always have a tape recorder or digital voice recorder handy...so you can sing the melody and record it.)

And what’s the end result of applying the above 3 steps (after all the editing)?
A powerfully moving song.

About the author:
Ron Balagot is a songwriter/musician/writer.  Through articles like this, he hopes to help aspiring songwriters attain their songwriting goals.  He can be reached at:  balagot.ron@gmail.com
source : www.valuablecontent.com
Related Posts with Thumbnails